Kasm Workspaces: Addressing HTTPS error on the fresh installation
Acquire private Trusted Root Certification Authority
Based on Create Your Own SSL Certificate Authority for Local HTTPS Development
Is it mandatory to have correct SSL certificate?
Yes and no. In some web projects, you can slip through the default "I know, just let me in" option in browsers. But nowadays, it is hard to find a website that doesn't load the JavaScript - and browser won't let you load a JS from the external sources when certificate is not valid.
From the security point of view - you should not deliver solutions that with invalid certificate. There was a question on the Reddit asked by cool-thinker - if such invalid certificate cases connection to be not encrypted. Let's see it now.
There is a great step-by-step wiki on the HTTPS traffic analysis with Wireshark. By applying this knowledge for the current Kasm Workspaces URL with invalid certificate, you can see that the data is encrypted.

Don't let it cloud your judgement, though - danger does not come from the lack of encryption, but from the lack of knowledge if the party that signed that certificate can be trusted.
Why not Let's Encrypt?
Let's Encrypt is a well-known, trusted Certificate Authority that allows everyone with the accepted TLD (top-level domain, like *.com or *.org) to generate secure certificate for their websites' SSL connections.
From Let’s Encrypt Community Support:
These are two distinct “systems” with distinct choices (choose one per domain):
- Use a private certificate [private CA] for a private domain.
- Use a public certificate [LetsEncrypt] for a public domain.
Another, similar response: Can I create a cert for a private domain?
In our example, we have a private domain that would like to be trusted by the public certificate of Let's Encrypt - that won't work. If we tried to do that:

So now, our plan is:
- Become private CA by generating private Root Certificate.
We will be using this certificate to trust other certificates in the trust chain. Our Root Certificate is the only certificate that needs to be installed on the all systems that will be accessing Kasm Workspaces. - Create new certificate for the usage of Kasm Workspaces.
This is the certificate that will be imported to the Kasm. This one will show up when accessing Kasm Web UI. Trust is granted by our private CA Root Certificate.
Acquire private Certificate Authority Root Certificate
Generate CA private key:
$ openssl genrsa -aes256 -out cybethme-ca.key 2048Generate CA Root Certificate (10ys validity):
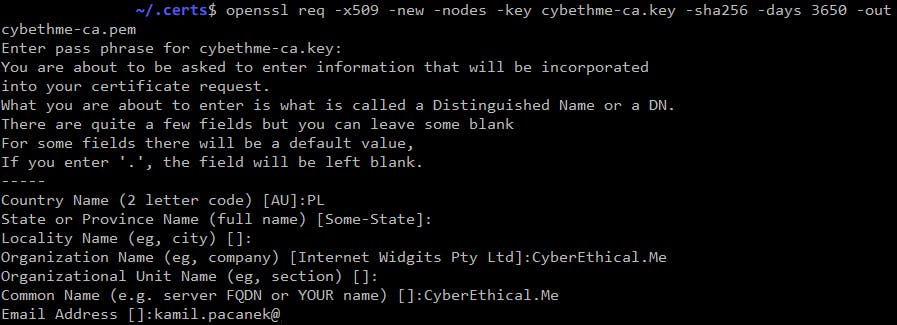
$ openssl req -x509 -new -nodes -key cybethme-ca.key -sha256 -days 3650 -out cybethme-ca.pem
ca-certificatesexpects PEM files with*.crtextension, so let's give it to him:$ sudo cp cybethme-ca.pem /usr/local/share/ca-certificates/cybethme-ca.crt- Update certificates database and verify:
$ sudo update-ca-certificates
# sudo update-ca-certificates --fresh / to rebuild from scratch
$ awk -v cmd='openssl x509 -noout -subject' '/BEGIN/{close(cmd)};{print | cmd}' < /etc/ssl/certs/ca-certificates.crt | grep Cyber

Acquire private certificate for Kasm Workspaces
Generate private key:
$ openssl genrsa -out kasm.rpi.key 2048Create Certificate Signing Request (CSR):
$ openssl req -new -key kasm.rpi.key -out kasm.rpi.csrCreate
extfile (kasm.rpi.ext) to supply during making a signing request.authorityKeyIdentifier=keyid,issuer basicConstraints=CA:FALSE keyUsage = digitalSignature, nonRepudiation, keyEncipherment, dataEncipherment subjectAltName = @alt_names [alt_names] DNS.1 = kasm.rpiCreate signed certificate for the Kasm:
$ openssl x509 -req -in kasm.rpi.csr -CA cybethme-ca.pem -CAkey cybethme-ca.key -CAcreateserial -out kasm.rpi.crt -days 730 -sha256 -extfile kasm.rpi.ext
Now you have the CRT certificate that can be used in application.
You may notice that additional SRL file for Root CA is created. It is required by OpenSSL to track serial number of generated certificates - read more about it here.
Upload certificates to Kasm and endpoints
SSH into Kasm server and replace certificate and the private key:
$ sudo /opt/kasm/bin/stop
$ sudo cp ~/.certs/kasm.rpi.crt /opt/kasm/current/certs/kasm_nginx.crt
$ sudo cp ~/.certs/kasm.rpi.key /opt/kasm/current/certs/kasm_nginx.key
$ sudo /opt/kasm/bin/start
Copy CA Root Certificate to the systems that will be using the Kasm Workspaces. It depends on the system, but on Windows - double-click the certificate and import it to Local Machine (or Current User) in Trusted Root Certification Authorities.
Change
hostsentry (on endpoint) to point chosen Kasm address to the IP address.192.168.0.105 kasm.rpi
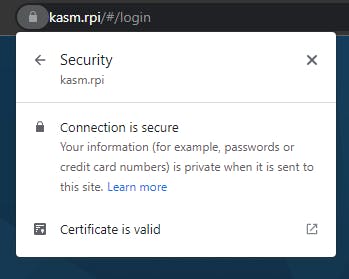
Now we have access to the Kasm Workspaces without errors on the browser.

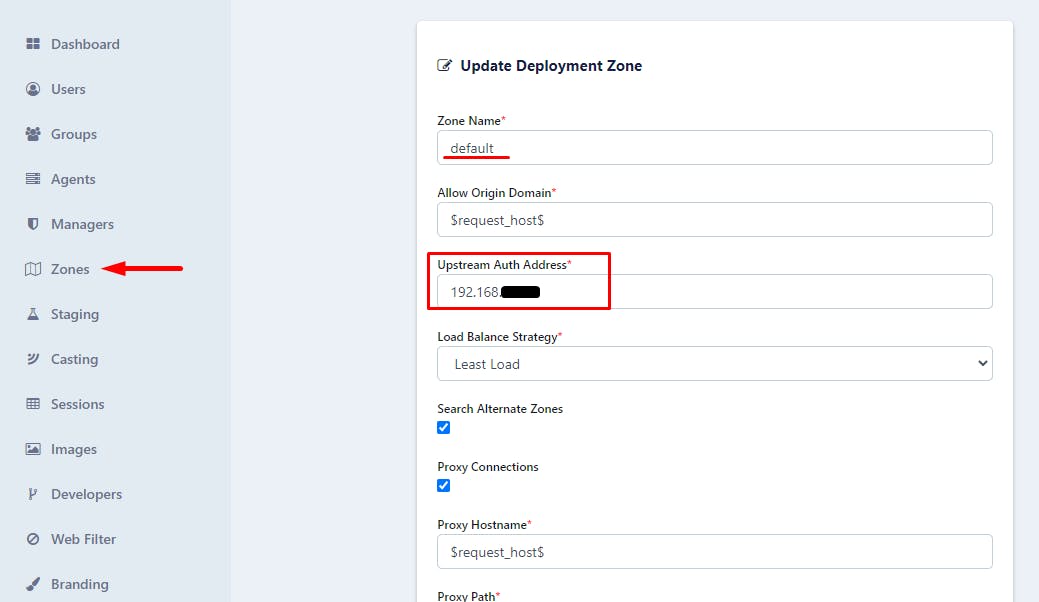
Unfortunately, this is not the end. When I tried to launch an image, I've got an error message. Last step is changing the Upstream Auth Address for the default zone to the local IP address:

Conclusion
So far, we have a working Kasm Workspaces installation that we can connect via secure SSL connection. After making the device accessible over the Internet, you can perform containerized operations from any system using a browser. In the next tutorials, I will showcase how you can add more images to the Kasm and how you can persist data between sessions.
Check out other guides from the Kasm Workspaces Rapberry Pi series.

