How to install Kali on a Raspberry Pi
Mobile hack station on a headless Kali ARM configuration

Currently working as a Senior Consultant at Netcompany spending my full-time job solving the SharePoint riddles. In the free time I'm expanding my understanding of cybersecurity through hacking activities. Git fanboy.
What do you need
My setup
I have used the following products when working on this project.
I'm getting a small commision for the purchases made from the links below
- Raspberry Pi 4B 8GB RAM
- SD Card (at least 32GB)
- Raspberry Pi 4 Power Supply
- Argon NEO Raspberry Pi 4 Case
- Ethernet cable (for the initial configuration or Internet over LAN)
Raspberry Pi
I can't guarantee any model would have enough calculation power - but I think version 3 would be sufficient. I'm using the Raspberry Pi 4B - which I finally received as a reward for the most interesting write-up from the DataDog CTF.
SD Card
Officially recommended card size is 16GB with a Class 10. I would say 32GB is an optimal - and maybe a minimum when you are going for GUI.
Remember that SD card is the weakest link in this setup, be prepared that sooner or later you will have to replace the SD card. Make frequent backups.
Second system
Connected to the same network as Raspberry Pi. Needed to handle first configuration and write a Kali image on SD.
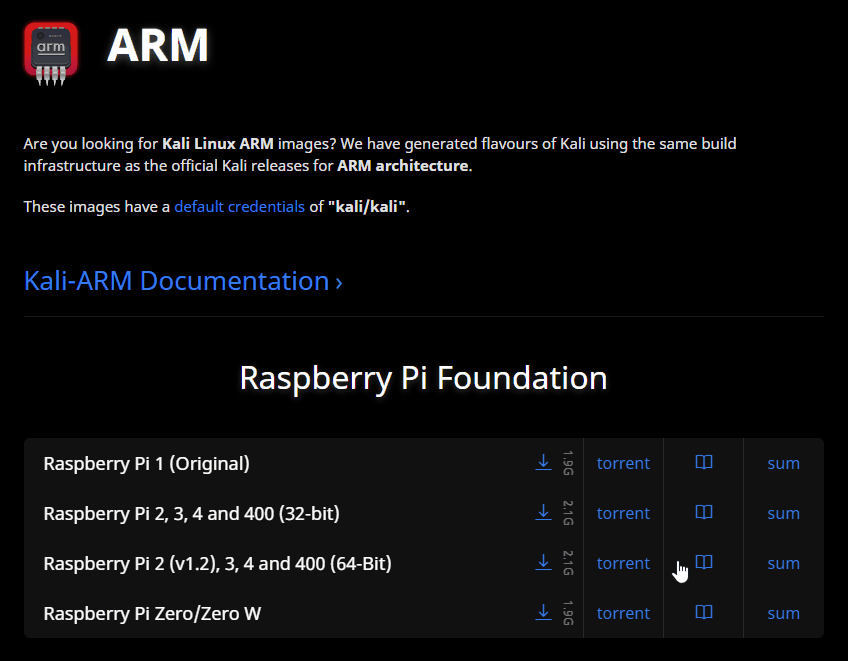
Official Kali Linux ARM image
Plain and simple - go to download pages and grab an image for your Raspberry.
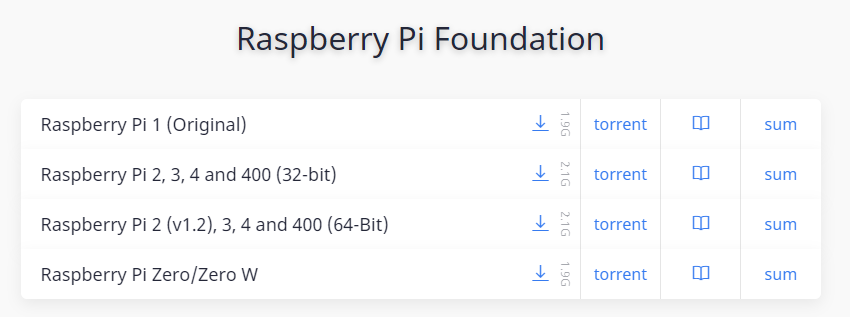
Download image
I'm having a Raspberry Pi 4B, and I'm choosing the 32bit version, so I'm downloading the Raspberry Pi 2, 3, 4 and 400 (32-bit) version.
Remember to verify your download. For that copy, the SHA256sum and save it in the following format:
{SHA256sum from kali.org} {image file name}
In my example, it is
9da12eb9899c7b9a6860ba421bb9f45ce023593b58869ff2ab8db69ce8aa2630 kali-linux-2021.2-rpi4-nexmon.img.xz
Now run the command to verify file integrity
- Linux:
sha256sum --check {checksum filename}

- Windows:
Get-FileHash -Algorithm SHA256 {image filename}

If hashes are the same - you can with certain probability say that the file is unaltered.
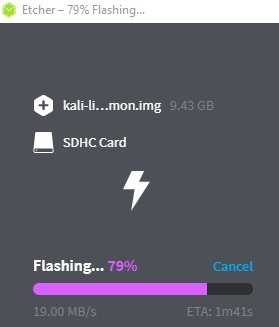
Install Kali on SD Card
Decompress the *.xz archive and write the image on the SD Card. This can be done with
- Win32Disk Imager
- Etcher
- dd (Linux)
I'm using Etcher.
Headless configuration
I want to reduce overhead on the device, so I'm deciding to run the Kali only via SSH.
Dynamic IP
Leave dynamic IP settings using DHCP if you are planning moving your Raspberry between locations.
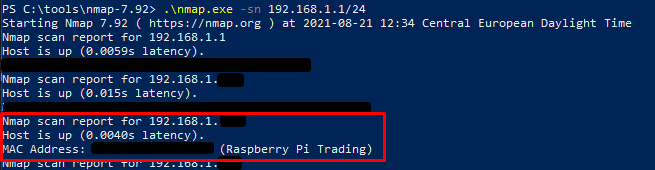
After connecting it to network (via Ethernet cable) first thing you should do is running nmap ping sweep from other system connected to the same network to find out what IP address got assigned to Raspberry.
$ nmap.exe -sn 192.168.1.1/24
Local private networks are most often configured as
192.168.*.*or10.*.*.*so you also have to figure that out by discovering IP address and Gateway address for the other system (ip addroripconfig /all).
Alternatively, you can run following commands to use the Product info from MAC Address Vendor info
# Ubuntu and Mac OS
# may require `sudo apt install net-tools`
arp -na | grep -i "b8:27:eb"
arp -na | grep -i "dc:a6:32" # Raspberry Pi 4

# Windows
arp -a | findstr b8-27-eb
arp -a | findstr dc-a6-32 # Raspberry Pi 4
Static IP
If you are setting up the Raspberry to be connected only to one network, you can assign it the static IP, so you can skip the discovery step each time the device is powered on.
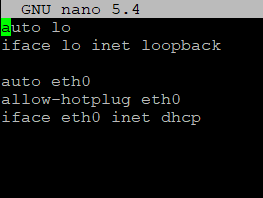
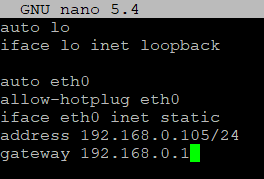
$ sudo nano /etc/network/interfaces
Find the line
iface eth0 inet dhcp
And replace it with this, where address fits within network range dedicated by mask and gateway address.
In this example I could choose any IP in range
192.168.0.2-254(excluding existing IP reservations).192.168.0.1is a gateway address and192.168.0.255is a broadcast address on mask255.255.255.0(or/24in CIDR notation)
Read more in the subnetting overview here.
iface eth0 inet static
address 192.168.0.105/24
gateway 192.168.0.1
Or setup it on your gateway - in my DHCP settings I can specify MAC address to have the same IP every time it is connected.
Set up DNS
Right now, you don't have the connection to the Internet (unless you have a DNS Server at default configuration).
$ sudo nano /etc/resolv.conf

nameserver 8.8.8.8
Resize partition
Most probably that you have installed the Kali on the SD Card bigger than 10GB, so right now you have much unused space and - like me - you can encounter space issue when running next steps.
If we would not use Raspberry Pi dedicated image, this process would be more complicated (but not too complicated). I have linked some gudies in the Additional readings) section.
Simply run
sudo raspi-config --expand-rootfs
After that completes, you will be asked to restart the device. Type sudo reboot and connect again after Raspberry is booted and SSH service is running.
Hardening
Because after installation default credentials are set to kali/kali it is important to either secure this account or create a new one and remove the kali. I would recommend the second one - for practice and for additional security.
Add new suduer account
Replace
USERwith your account name
$ sudo useradd -m -s /bin/bash USER
$ sudo passwd USER
$ sudo usermod -aG sudo USER
Verify
$ sudo su USER
$ id
$ logout
From now on, run all commands as a new user.
Enable SSH login
If you do not have already an RSA private/public key-pair lying around, you can create one by running the following command on the local machine.
$ ssh-keygen -t rsa
Then copy the public key to the user home.
$ nano ~/.ssh/authorized_keys
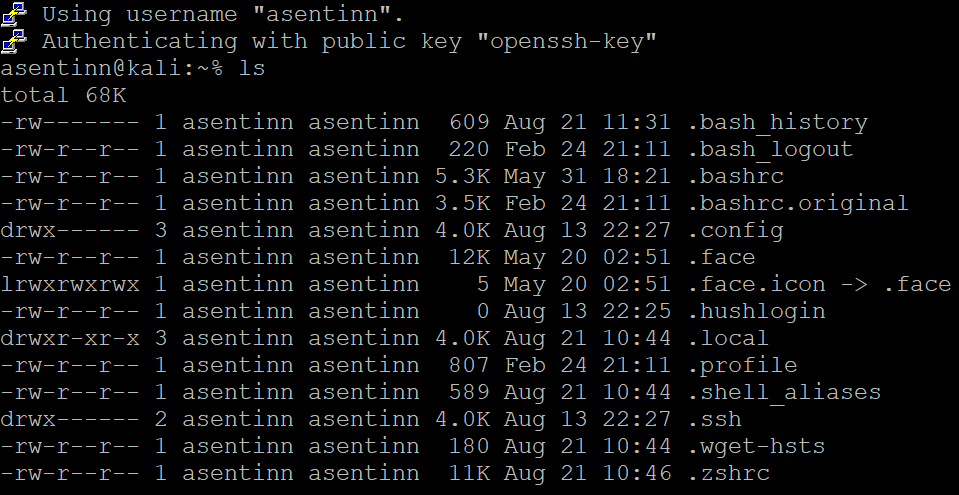
Now you should be able to access your account via the SSH connection.
When using the PuTTY you should use the PuTTY Key Generator like it os described here.
Disable root & password login
We don't need to root login, so we can disable it
$ sudo nano /etc/ssh/sshd_config
    ChallengeResponseAuthentication no
    PasswordAuthentication no
    UsePAM no
    PermitRootLogin prohibit-password
$ sudo systemctl reload ssh
Remove default kali user
$ sudo userdel -r kali
-r remove also home directory.
If for some reason operation fails because
kalistill runs some processes, runsudo killall -u kalibefore.
Verify
root login should be denied, also new user password login should not work.
$ ssh root@IP
Permission denied (publickey).

$ ssh USER@IP -o PubkeyAuthentication=no
Permission denied (publickey).
Update
Run the following commands to update your packages and distribution.
sudo apt update &&
sudo apt dist-upgrade -y &&
sudo apt autoremove -y &&
sudo apt autoclean
Alternatively have a file with your aliases and additional configuration downloaded and applied.
See my example of a configuration files on GitHub repository Kali Linux on Amazon EC2 | Kali configuration
Personalization
Terminal colors
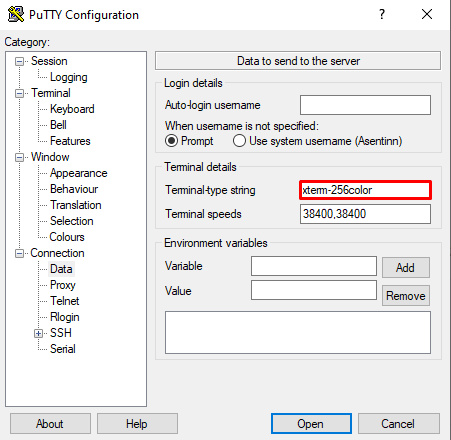
Sometimes (maybe always?) when you first time connects via PuTTY you've got not color on the terminal - for me, it is confusing to work like this because everything blend together.
The solution for this is setting the terminal type string in PuTTY to xterm.
Change default shell
Unfortunately I found the
zshshell via PuTTY, somewhat faulty when working multiline command and using autocomplete. If you know how properly setupzsh, please comment below
Let's say right now user have default bash shell, and you want to have it changed to zsh.
First verify the current shell and list all available options.
$ cat /etc/passwd | grep {USER}
$ cat /etc/shells
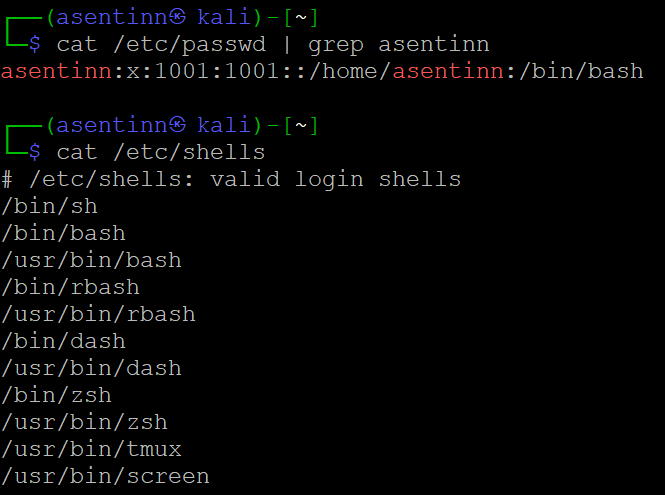
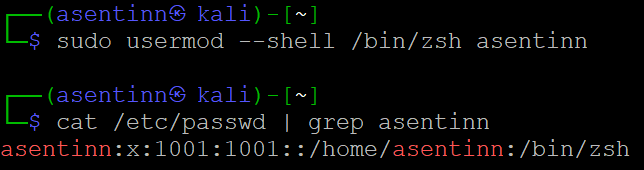
Then by using usermod change the default shell to the zsh (or any other listed in /etc/shells).
$ usermod --shell /bin/zsh asentinn
Final touches
Now you can continue with the advices gathered in my previous article on Kali Linux on Amazon EC2. For example, you could probably have noticed already that Ctrl + arrow keys doesn't do the word movements.
Comparison between AWS EC2 and Raspberry Pi 4B
| AWS EC2 | Raspberry Pi 4B |
 |  |
As you can see, even the weakest AWS EC2 box is much more efficient in calculating MD5 hashes. Nevertheless, this is a pretty fun project to complete if you have the Raspberry Pi lying around.
Connect over the Internet
It is possible to SSH into the device over the Internet - it is a very useful option in my opinion, especially if you are working over VPN and can't simply access the local private network.
However, most certainly this requires port forwarding setup on your gateway to pass through the 22 port into the device IP - this is specific to your manufacturer and is not in scope of this guide. To make it work, search in the manual of your gateway device (home router from the Internet provider) how to expose certain ports to the outside through port forwarding.