Android malware analysis: preparation
Installing Android on the Virtual Machine

This is a first article from Malware Analysis series where I'm presenting how you can safely grab the malicious code and by using various techniques like decompiling and deobfuscation see what it is doing. In these series, you are going to see different approaches and solutions that are used to bypass antivirus and other threat defenses, learn how to approach payloads and hopefully recognize common patterns that are reused by malicious actors. Enjoy!
Contents
🔔
CyberEthical.Meis maintained purely from your donations - consider one-time sponsoring with the Sponsor button or 🎁 become a Patron which also gives you some bonus perks. Join our Discord Server!
Download ISO
In this guide I'm using the Virtual Box, but you can use any other virtualization software.
Go to the official Android x86 project site - download page will list a few mirrors from which you can choose from. After navigating to the mirror site, Grab the Android ISO version you are interested in.
I'm downloading a 9.0 R2 version from Open Source Development Network.
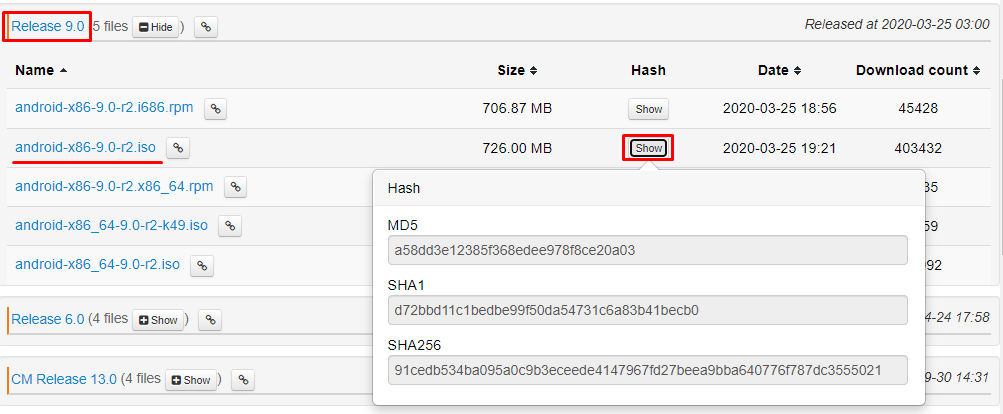
When download finished, verify the SHA-256 hash.
See: Why MD5 and SHA-1 are considered no longer trustworthy.
Create Virtual Machine
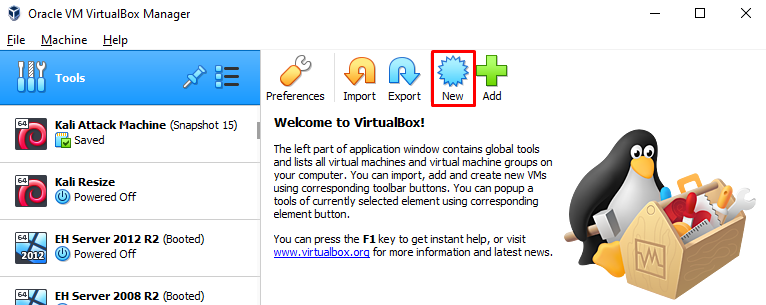
Open Virtual Box and click New.

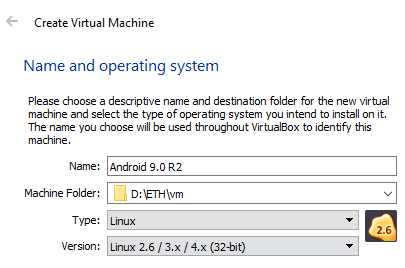
Choose Linux 2.6/3.x/4.x (32-bit) or Linux 2.6/3.x/4.x (64-bit).
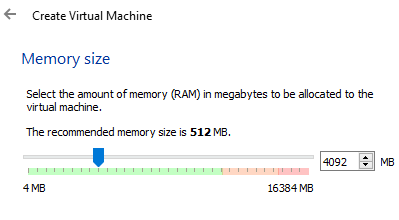
Set 4GB RAM.
Leave the default Create a virtual hard drive now.
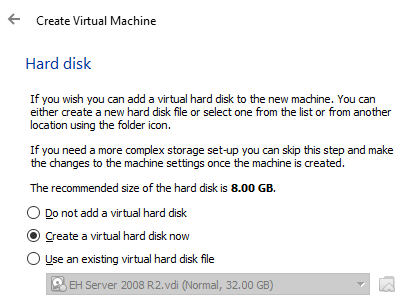
Leave VDI and dynamic allocation. Assign 8GB (default) size.
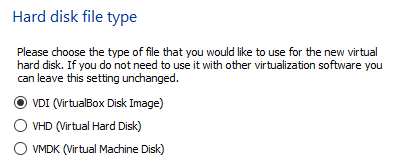
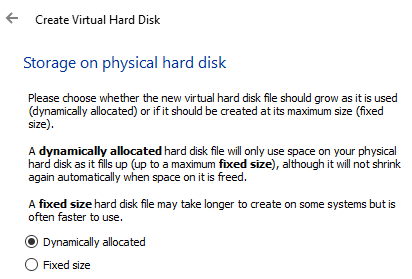
If possible save the disk file on the SSD. I've encountered significant slowliness when I initialy have it on the HDD.
Install Android system
Run the virtual machine and mount the ISO you have previously downloaded.
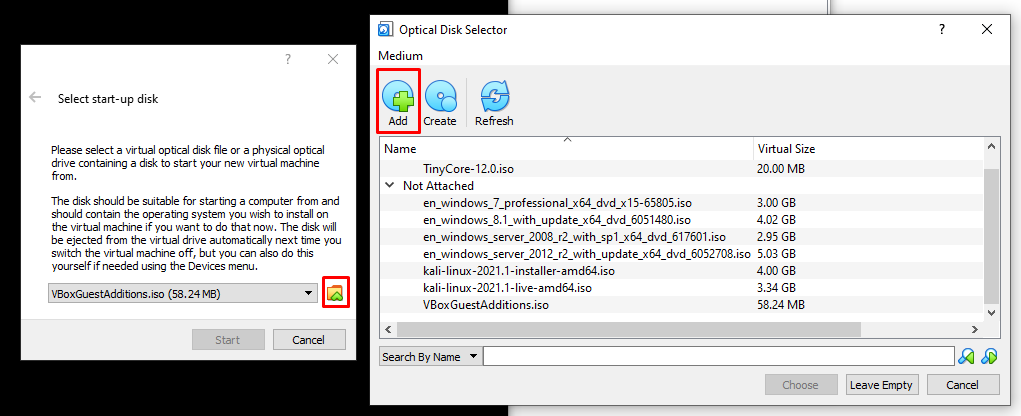
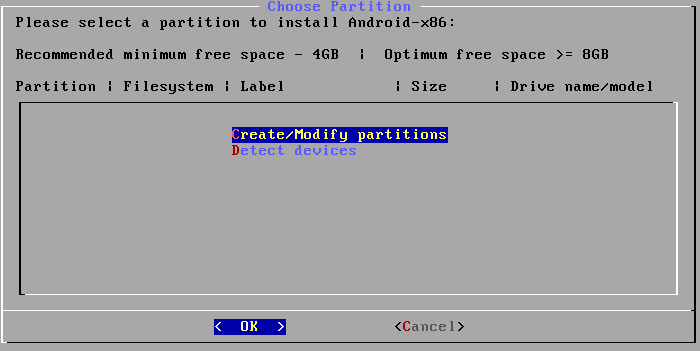
Click Start. Choose installation option. Select Create/Modify partitions by pressing C.
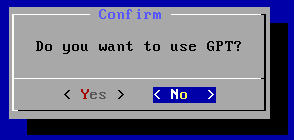
Decline GUID Partition Table usage.
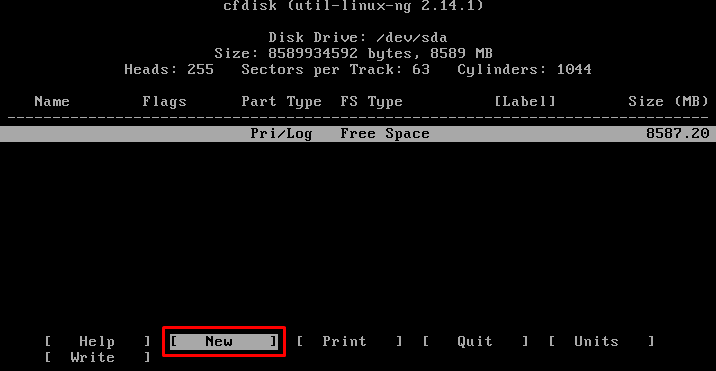
Create a new primary partition from the entire free space.
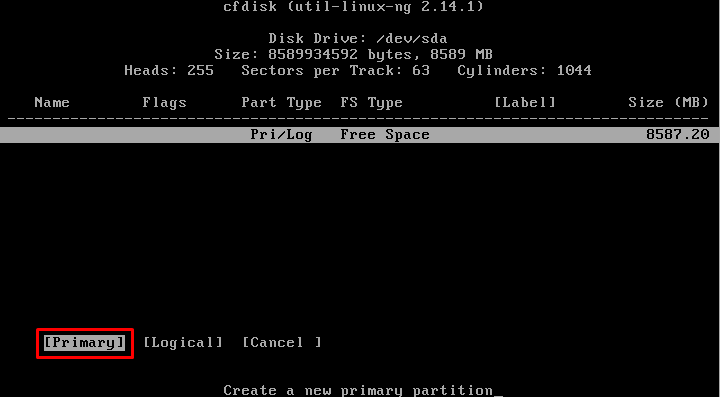
Mark it as a bootable and Write. Type yes confirming choices and wait until process is completed.
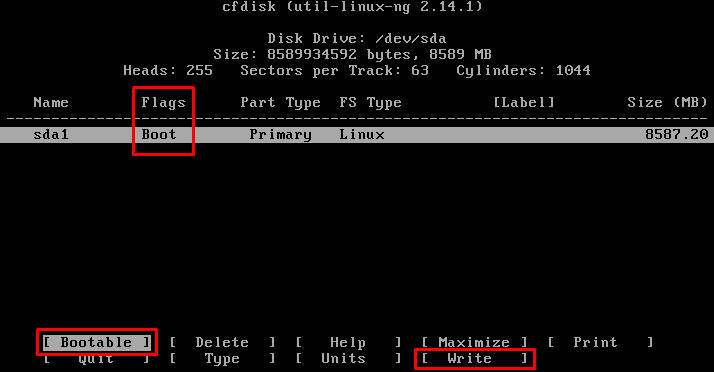
Quit - you will be back at partition selection screen.

Select the newly created partition.
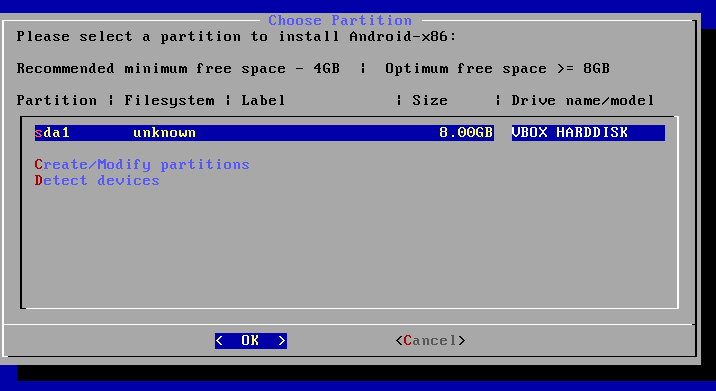
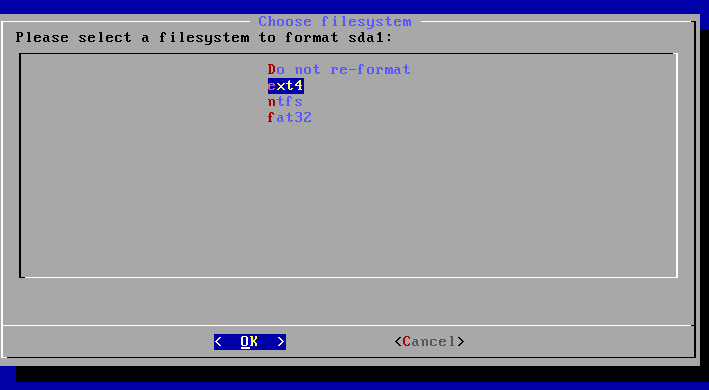
Format it using ext4 and confirm selection.
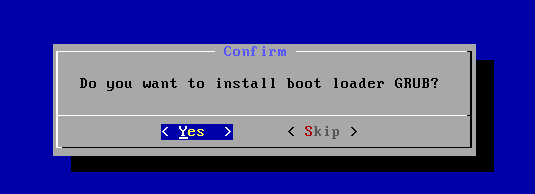
Install GRUB.
Make /system directory read/write.
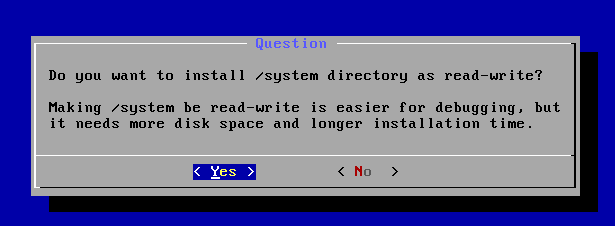
After installation is completed, it doesn't matter what you will choose because GRUB will appear either way.
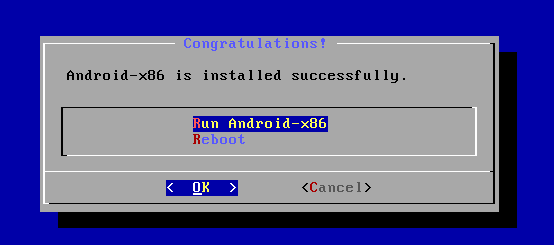
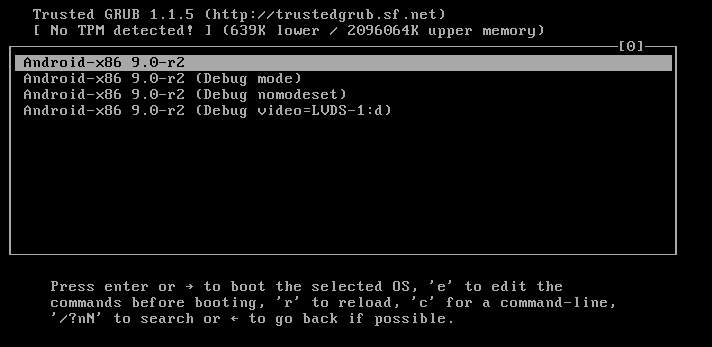
Common issue: no GUI
When booting for the first time, you could have two issues
- system is not booting at all
- Android is booting to shell

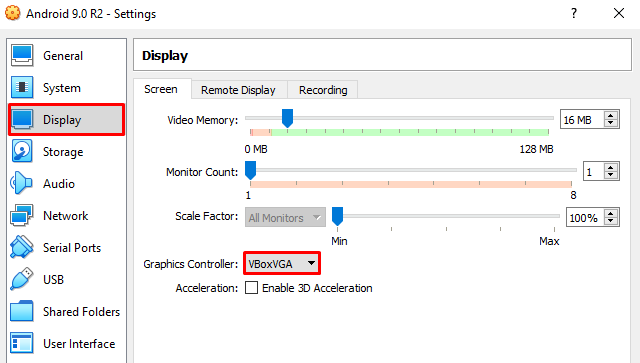
Solution for this is setting graphics controller to VBoxVGA (Settings -> Display -> Screen) and disable 3D acceleration.
Do you like what you see? Join the Hashnode.com now and start publishing. Things that are awesome:
✔ Automatic GitHub Backup
✔ Write in Markdown
✔ Free domain mapping
✔ CDN hosted images
✔ Free built-in newsletter service
✔ Built-in blog monetizing through the Sponsor feature
By using my link, you can help me unlock the ambassador role, which cost you nothing and gives me some additional features to support my content creation mojo.
Network
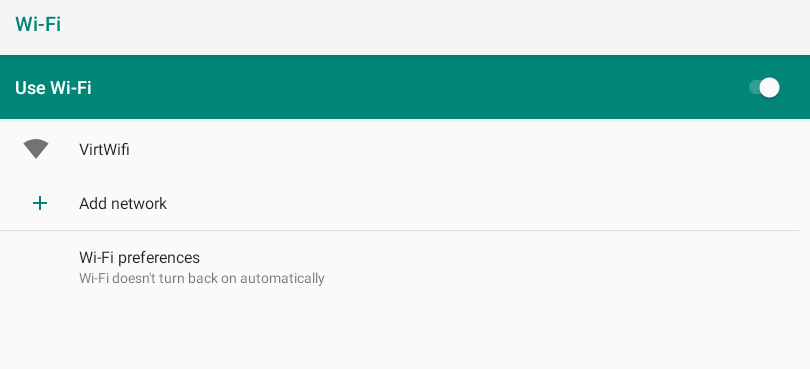
By default, Virtual Box configures NAT, so you don't have to do any additional configuration. Upon entering the system, you will be allowed to select Wi-Fi Connection called VirtWifi. After connection is established, you are ready to go.
Snapshots
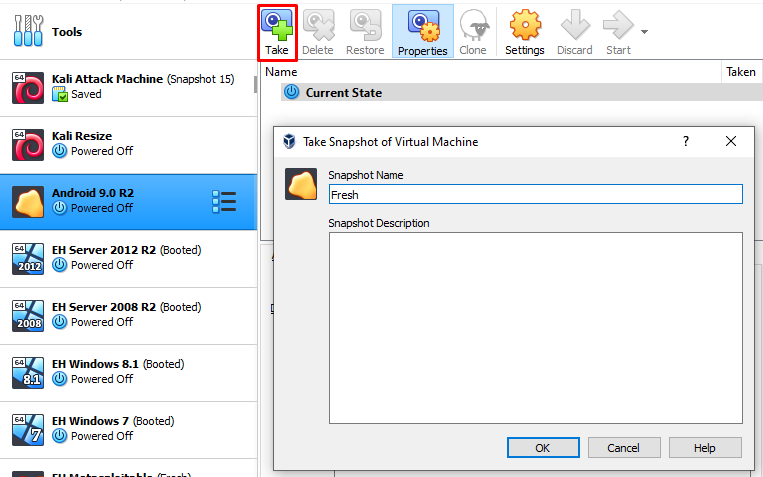
Turn off the system and create a snapshot of the fresh state of the virtual machine. Do the same before any malicious software testing.
Additional readings
📌 Follow the
#CyberEthicalhashtag on the social media
🎁 Become a Patron and gain additional benefits
👾 Join CyberEthical Discord server
👉 Instagram: @cyber.ethical.me
👉 LinkedIn: CyberEthical.Me
👉 Twitter: @cyberethical_me
👉 Facebook: @CyberEthicalMe
- VirtualBox - Android x86 - Don't boot in GUI but just in command line
- VirtualBox Network Settings: Complete Guide
- Grub won't boot after converting MBR partition table to GPT
- Why are MD5 and SHA-1 still used for checksums and certificates if they are called broken?
- Android-x86 - Porting Android to x86
Malware icon made by Eucalyp from https://www.flaticon.com/
About the author
Currently working as a Senior Consultant at Netcompany spending my full-time job solving the SharePoint riddles. In the free time I'm expanding my understanding of cybersecurity through hacking activities. Git fanboy.
Comments
Join the discussionNo comments yet. Be the first to comment.