How to dual boot encrypted Kali Linux with Windows 11
Partitioning when dual-booting Linux with Windows
Currently working as a Senior Consultant at Netcompany spending my full-time job solving the SharePoint riddles. In the free time I'm expanding my understanding of cybersecurity through hacking activities. Git fanboy.
Prerequisites
- Windows 11 already installed and running
- Free space on drive where we are going to install the Kali Linux
- Bootable USB drive with Kali Linux
Preparation
Follow the Kali installation as usual until you encounter the partitioning step - choose "Manual partitioning". This screen is the main one we are going to come back to after each of partitioning operation. I'll be using the highlighted free space to setup the Linux partitions.
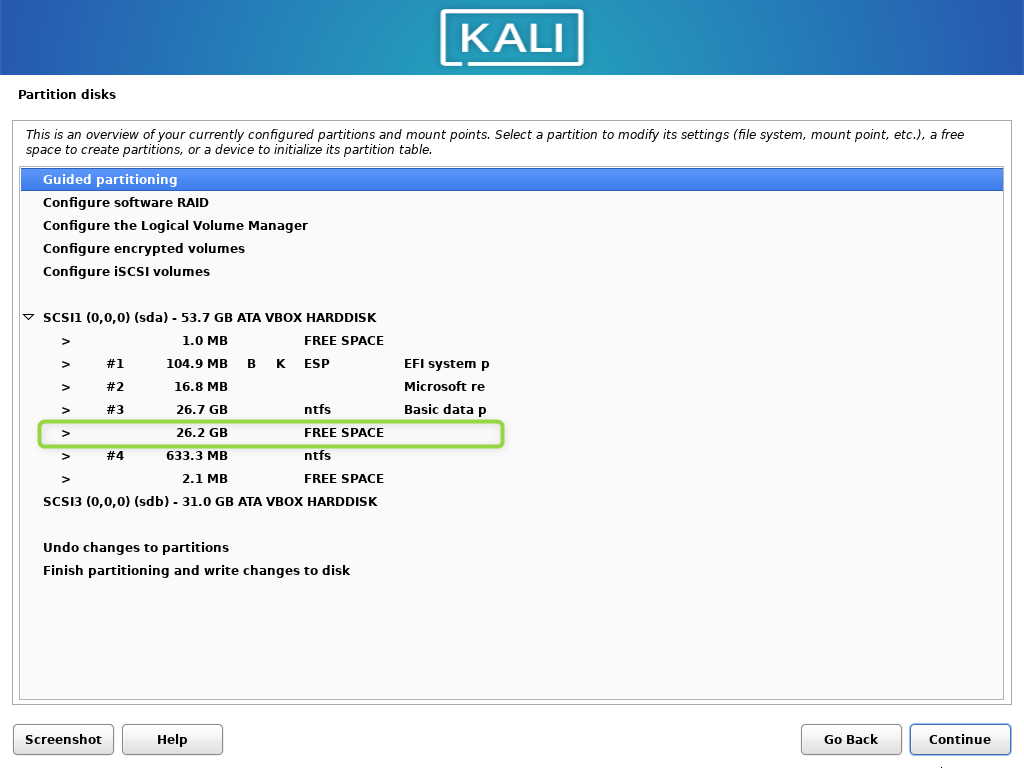
Create non-encrypted boot partition
- Double click the free space (or click Continue with Free space selected).
- Select New partition. Set it to 1.8GB.
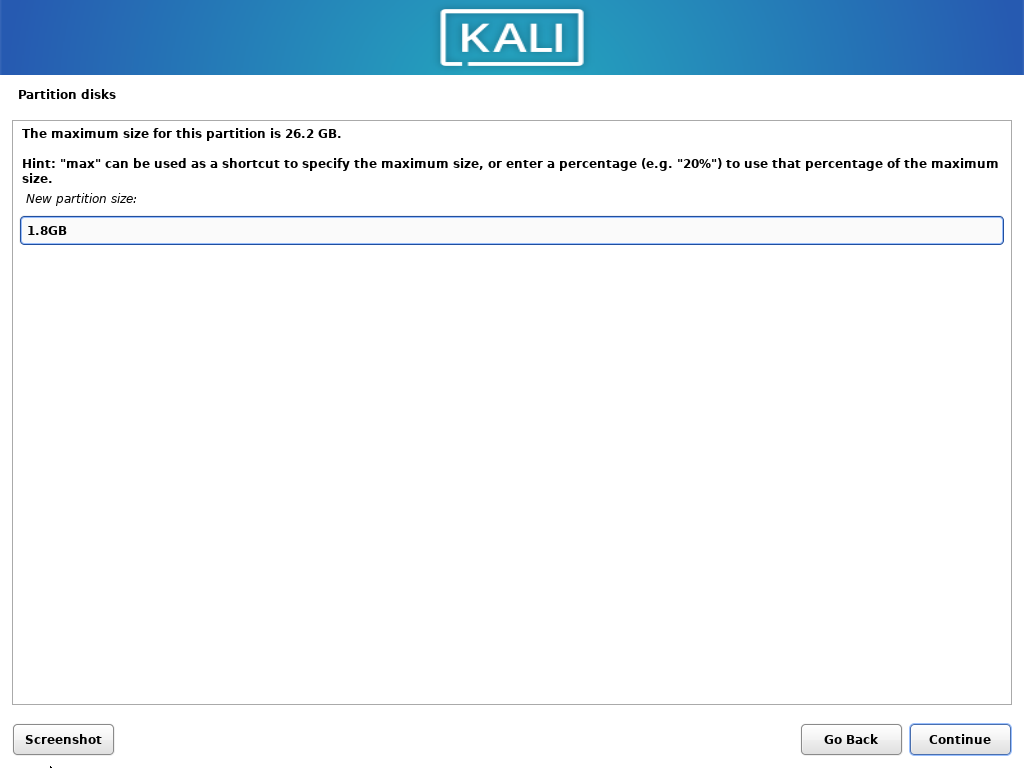
- Create at the beginning of free space.
- Set the values as shown below.
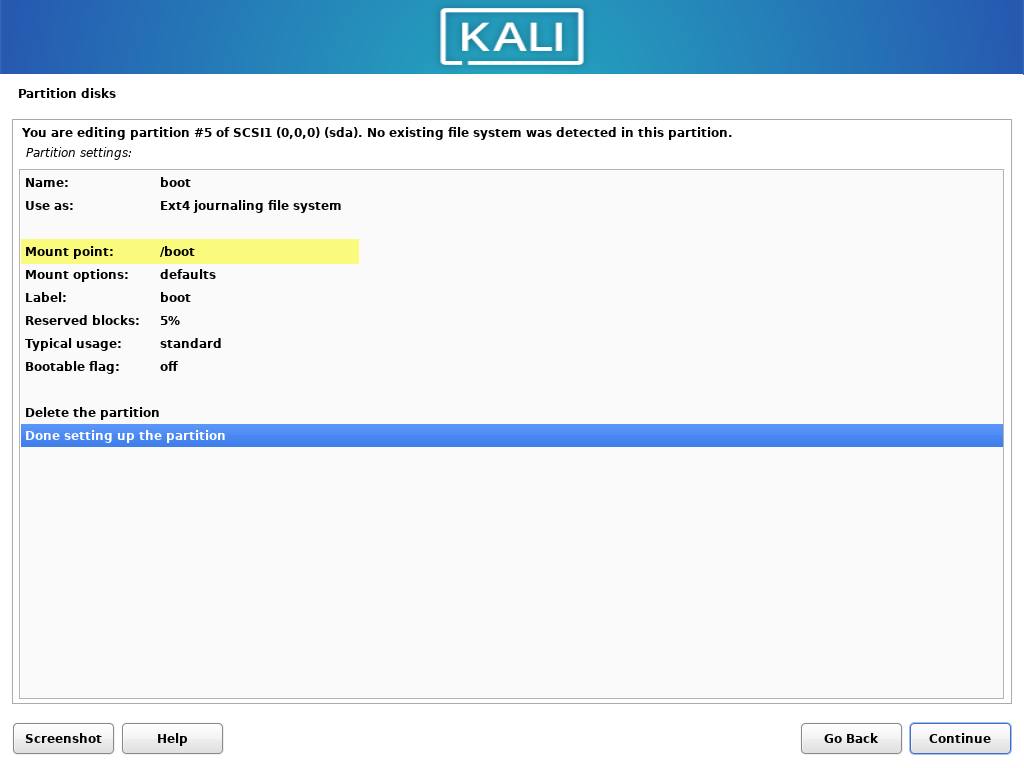
- Confirm setting up partition.
- Rest of the free space assign
ext4- it will be the filesystem encrypted partition.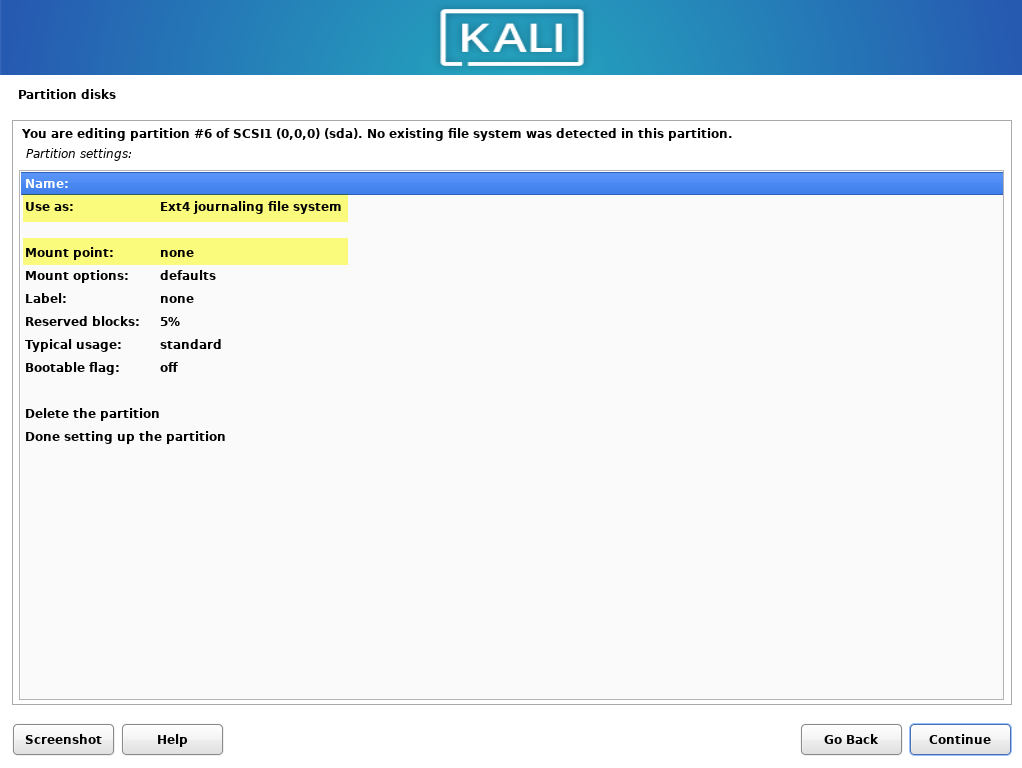
❗ When writing a guide, I've tried different solutions for placing the boot partition. Now I know it should be set as ext4, /boot mount point, not bootable and not encrypted. I've tried to change the images to correct ones, but I could omit a few. Please just remember ext4, not bootable.
Prepare encrypted filesystem partition
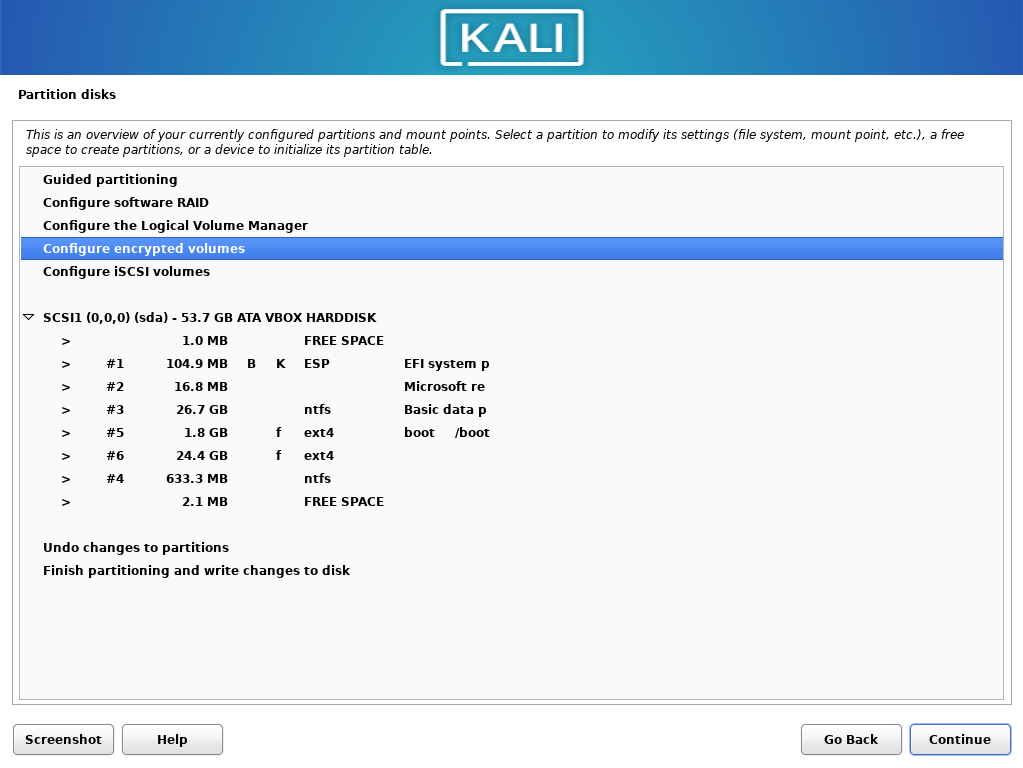
- Select Configure encrypted volumes
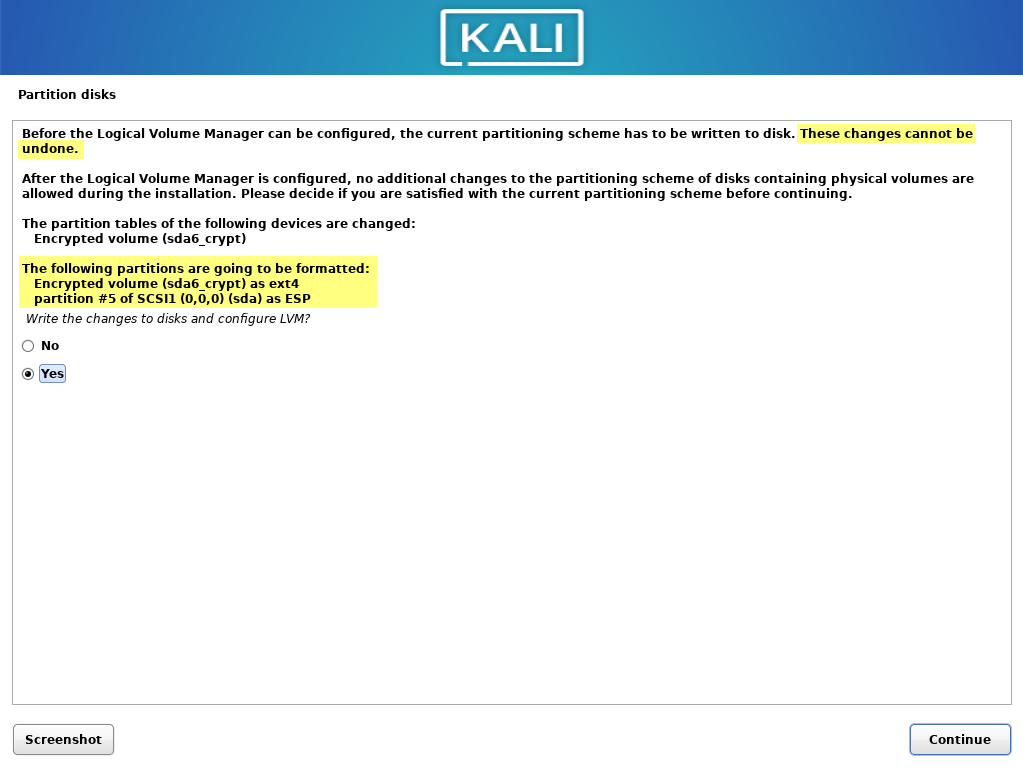
- Please notice that this step cannot be undone. After you confirm, boot and filesystem (which we are going to encrypt) will be formatted. Select Yes and Continue.
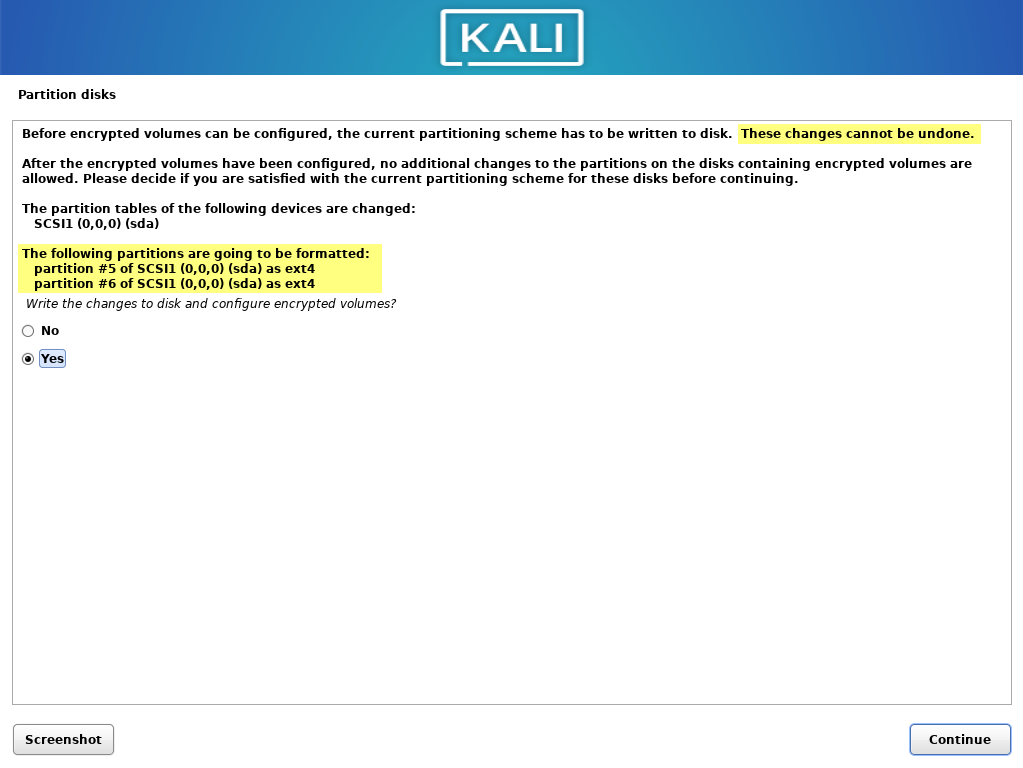
- Confirm creating encrypted volumes
- Select the filesystem partition (which was left after we created
bootin the first phase).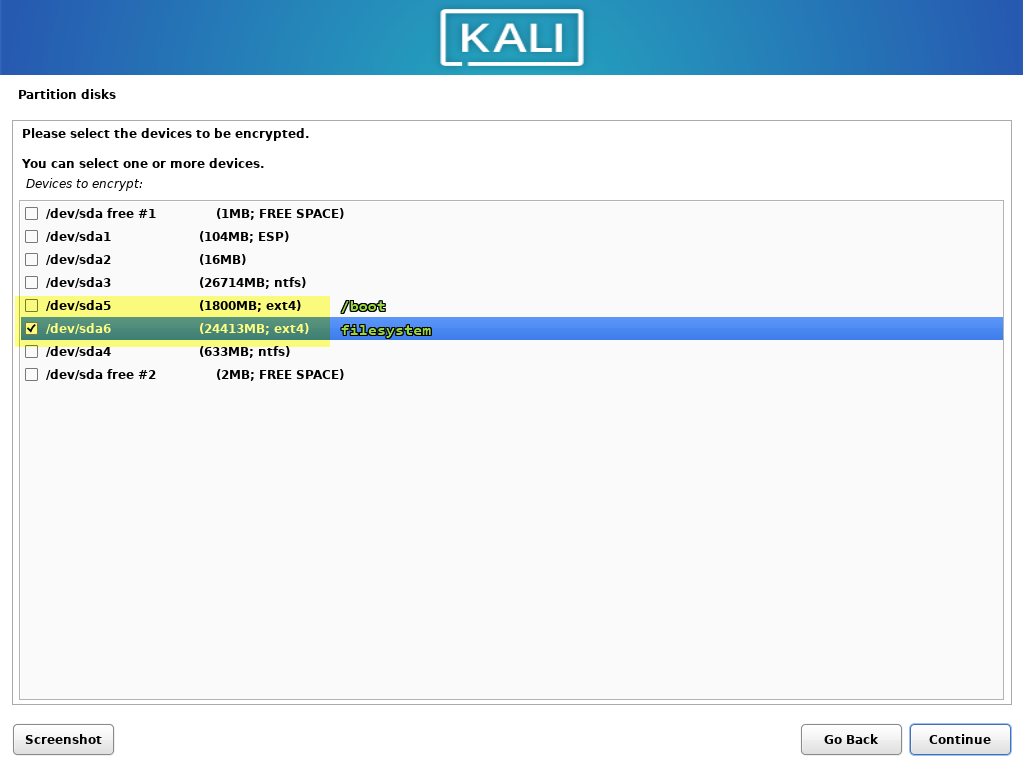
- Remove the
/mount point (select it and choose Do not mount) and confirm default encryption settings.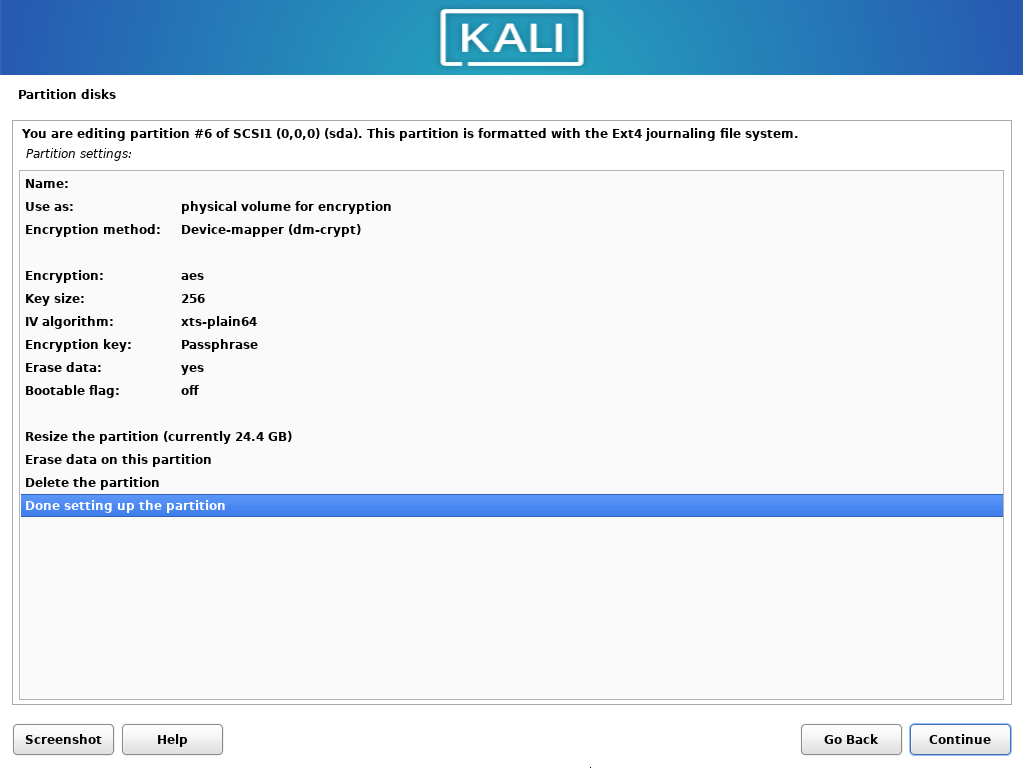
- Select Finish
- Confirm erasing the partition before encryption.
- Type the encryption password.
- After process finished you should end up with the similar setup.
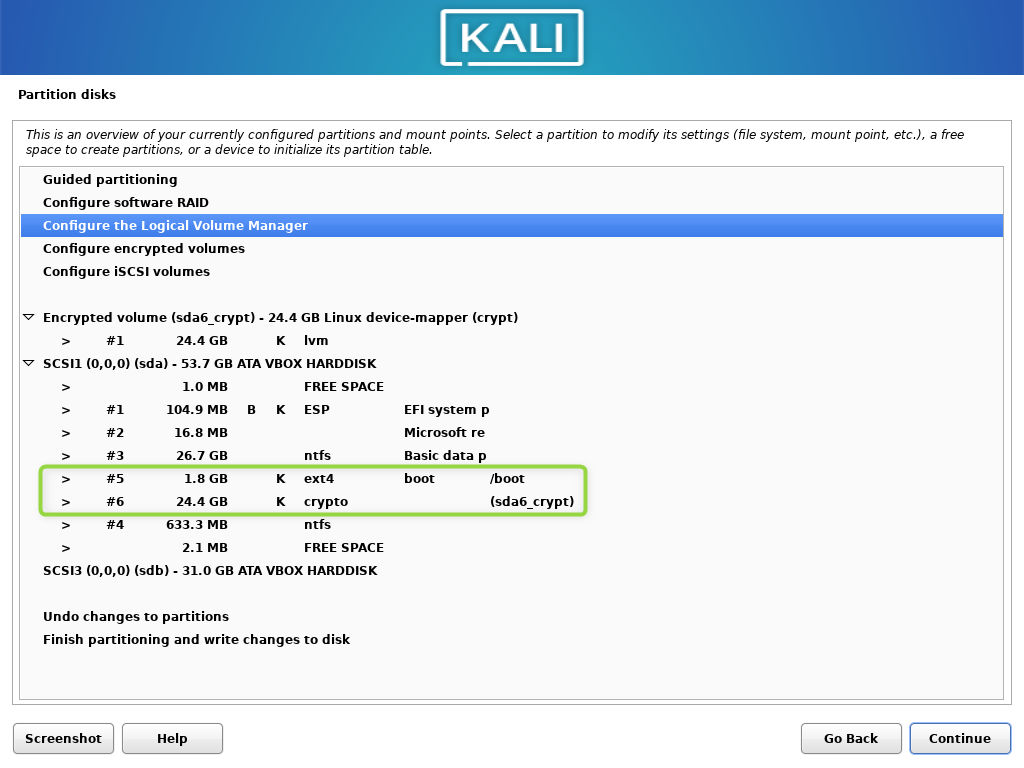
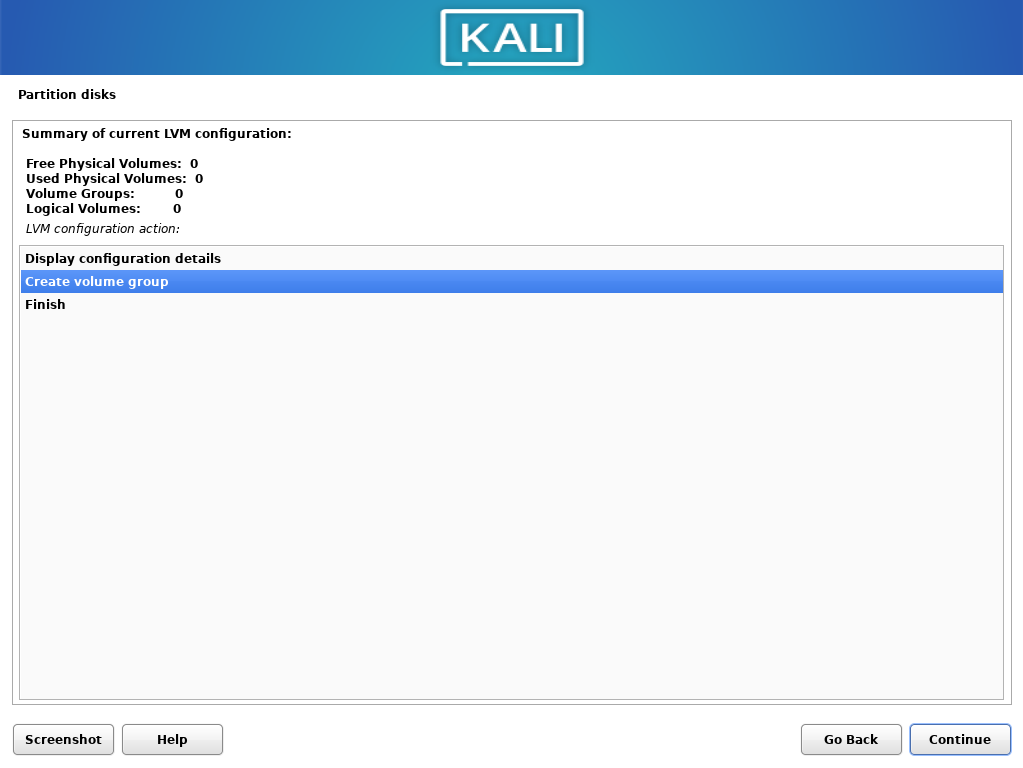
- Choose Configure the Local Volume Manager. Confirm.
Configuring LVM
You are welcomed with the following screen.
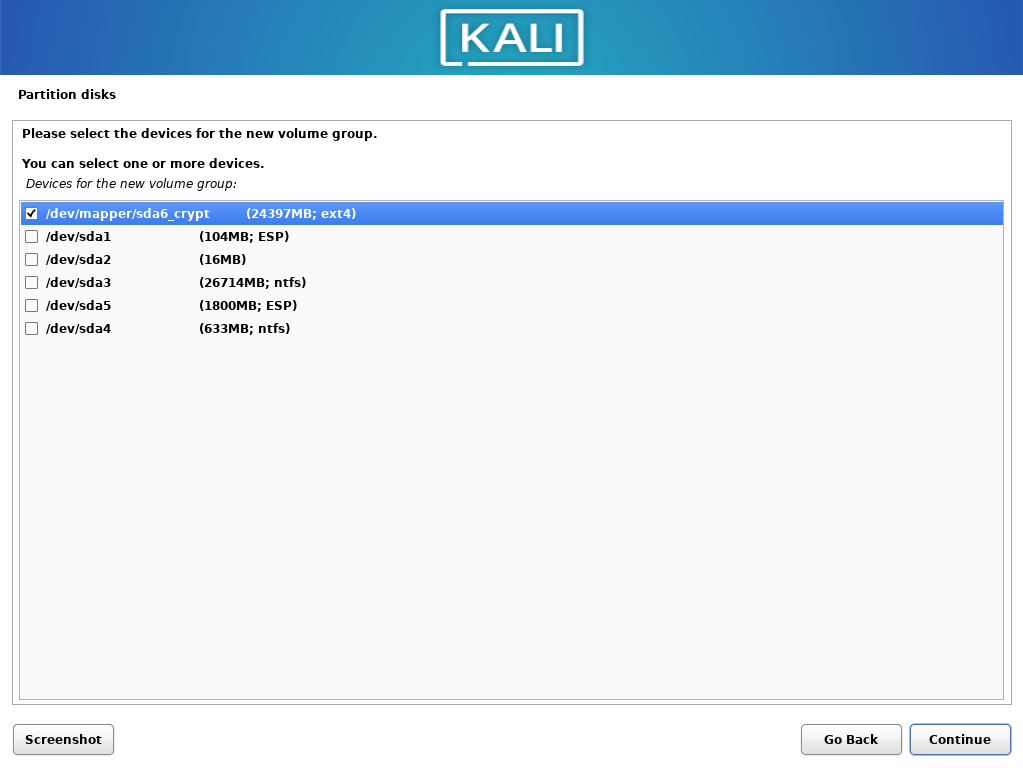
- Create new volume group "kali-vg1" and use the whole filesystem partition.
- Create logical volumes called
swap,root,var,tmpandhome.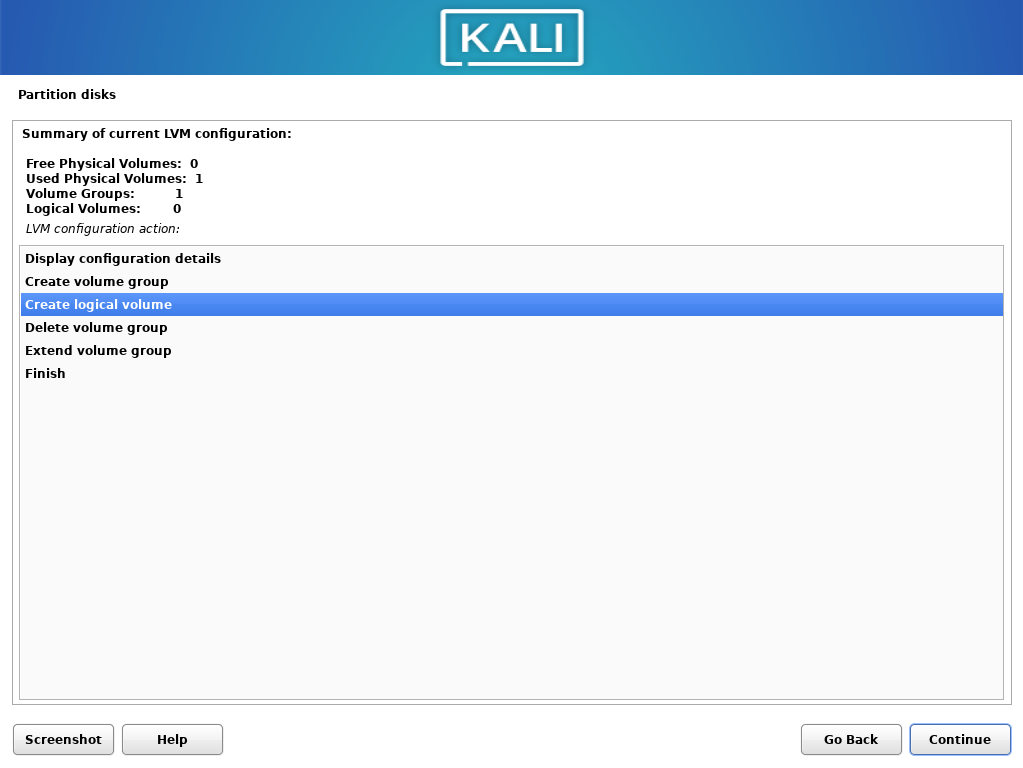
ℹ Only
swapandrootare required. I'm using separatevarandtmpmainly because of security reasons, separatehomeallow me to mount that in other distribution. - This is how it looks on my example.

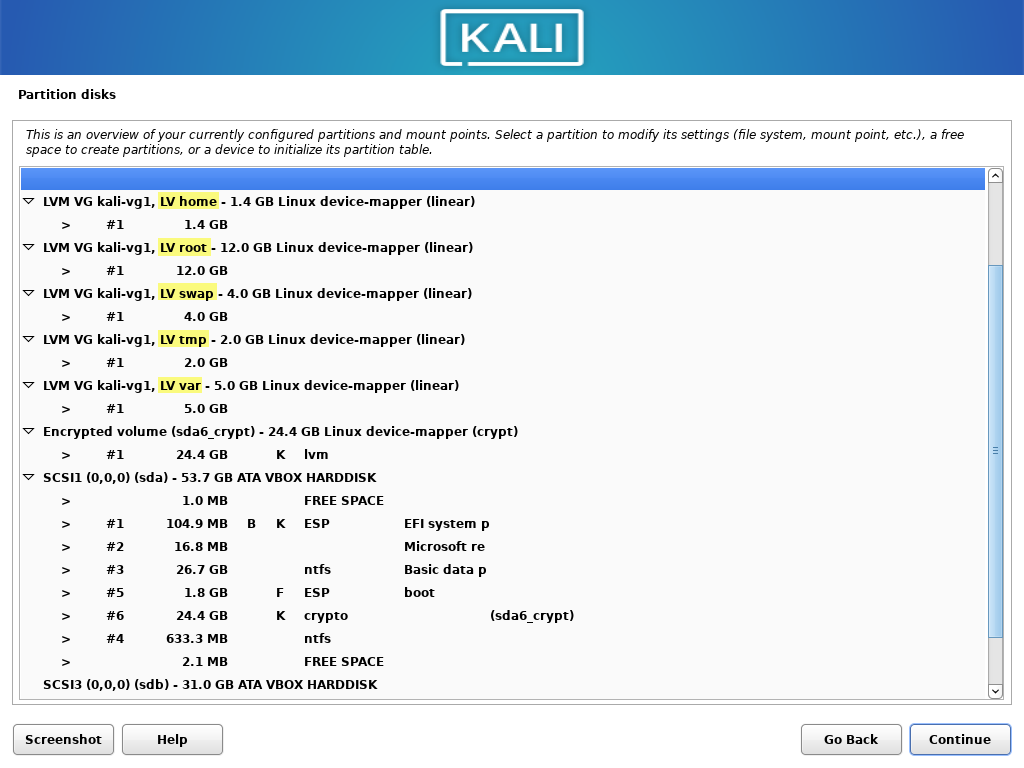
ℹ Please take these volume sizes with a grain of salt, I'm using small volumes to save on space when writing this guide (it doesn't matter for showcasing this idea).
- Select Finish and Continue.
Configuring mount points
Now it is time to final step: assigning mount points to freshly created logical volumes.
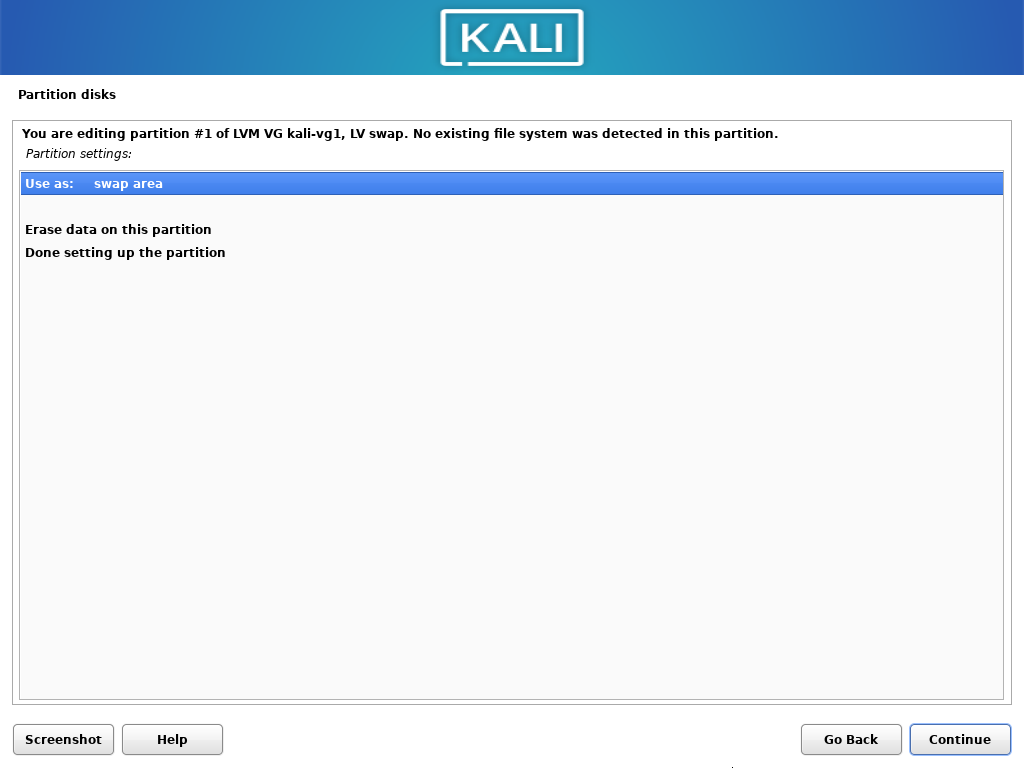
- Highlight the
swapvolume and click Continue (or double click).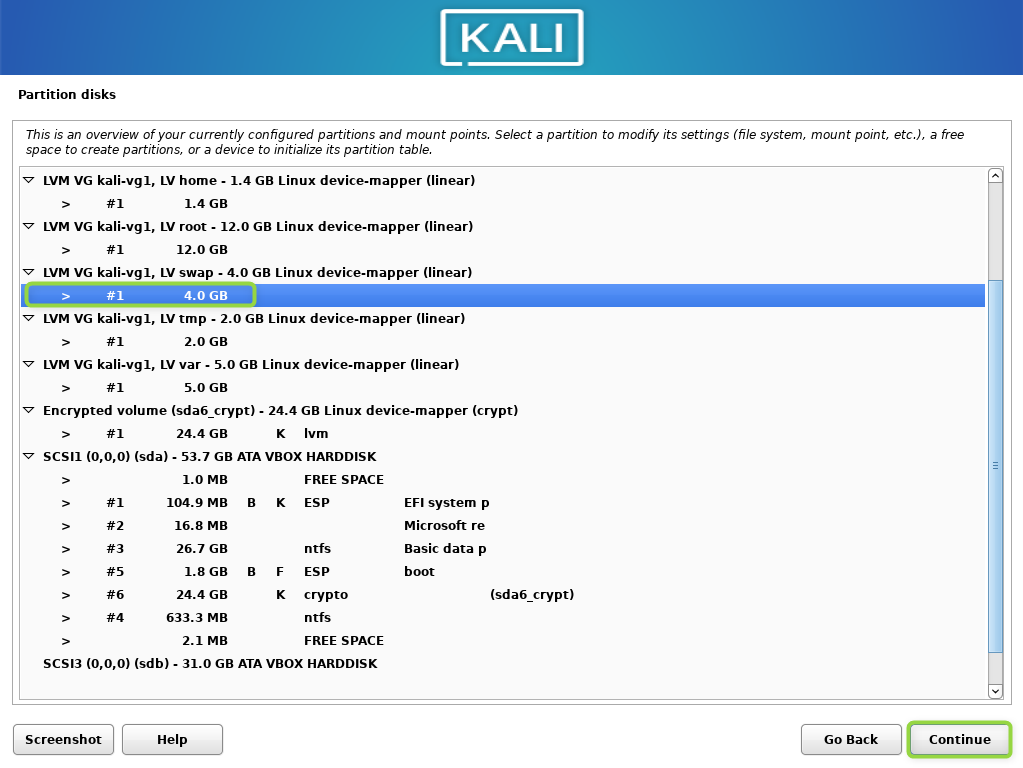
- Select Use as and choose swap. Confirm.
- Highlight the
rootvolume and click Continue. Fill details as shown below.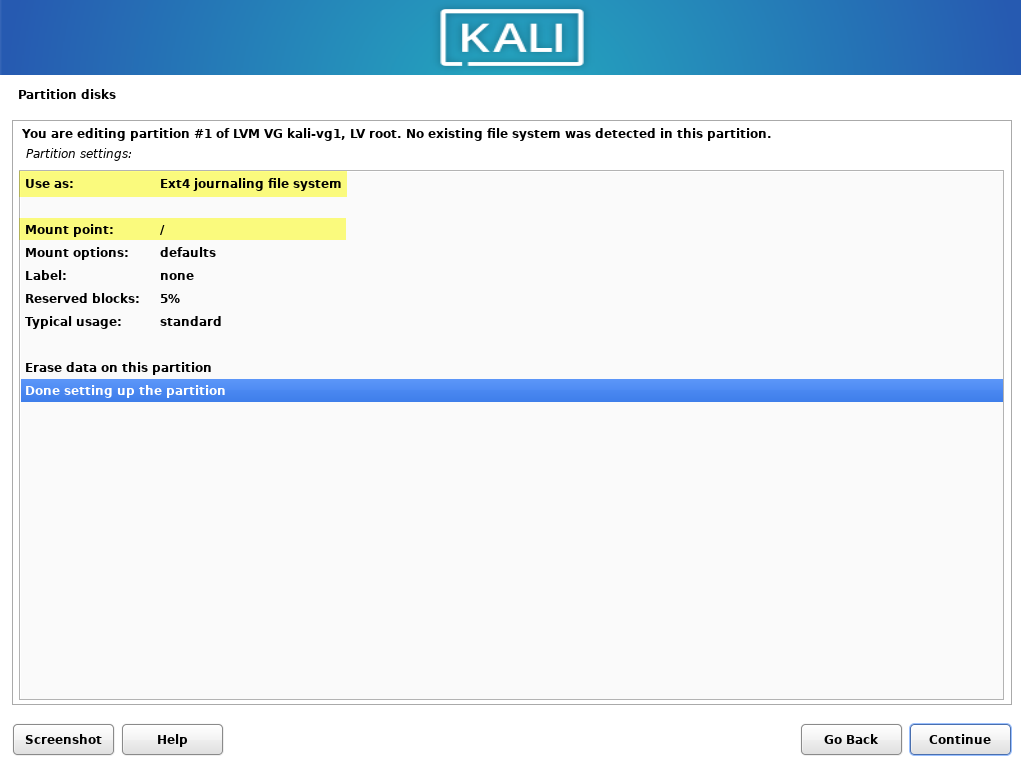
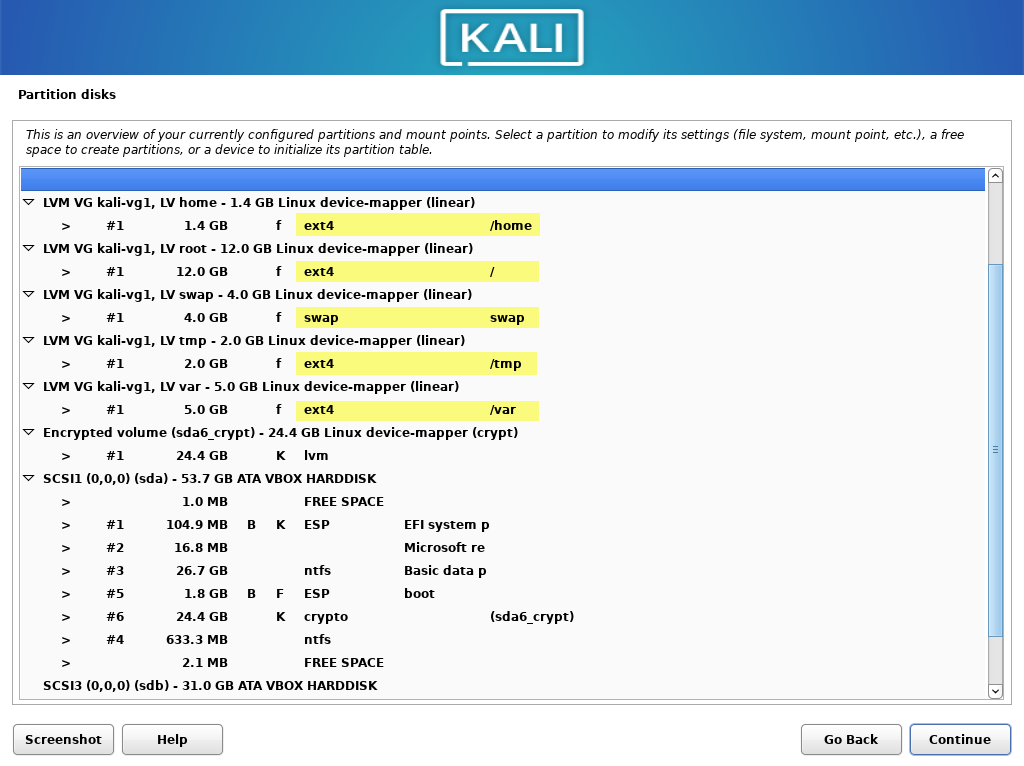
- Do the same for other logical volumes.
- This is how it looks afterwards:
- Select "Finish partitioning and write changes to disk"
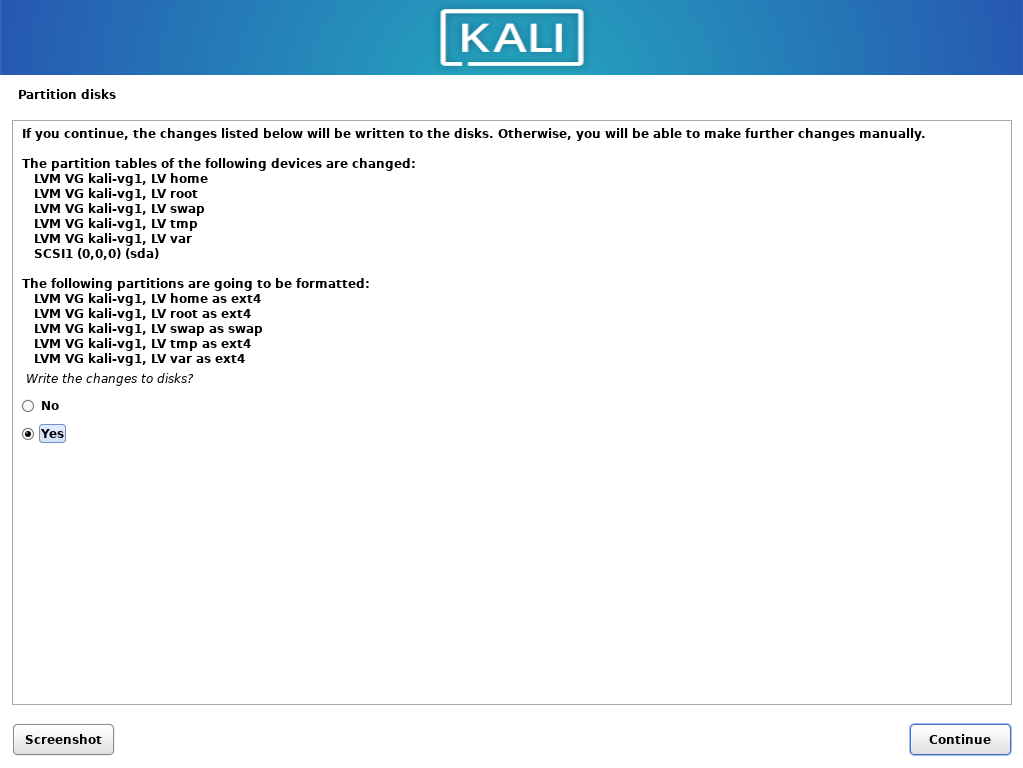
- Confirm. Continue with the installation.
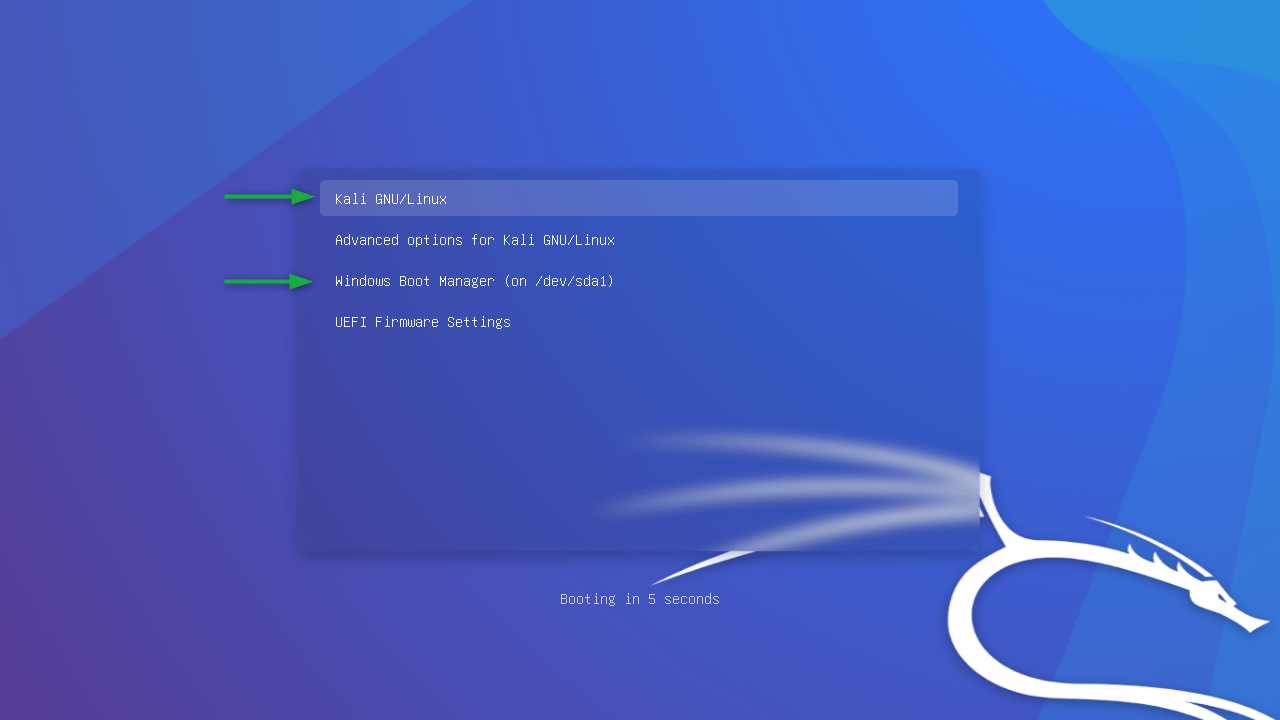
After reboot
With the setup I provided there is one more step - optional - without it, your machine will boot up automatically to Windows. You can still boot the Kali by interrupting the booting process (F2 on my Acer) and selecting the kali from boot manager.
ℹ If you want to be more stealthy with your Kali, so it is a bit harder to determine you are using it, it is perfectly fine to stop here.
Launch Kali either by
- interrupting the booting process and selecting Kali from boot manager,
- or restarting Windows with Shift key pressed when choosing Restart option from power menu; then select proper device to boot up Kali
Open console and type
sudo su
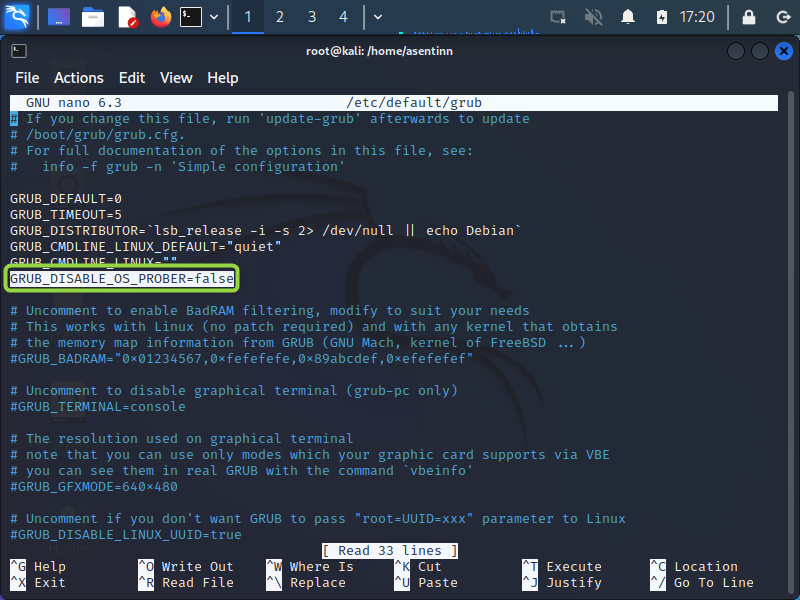
nano /etc/default/grub
Add the following line:
Save the file and run update-grub command
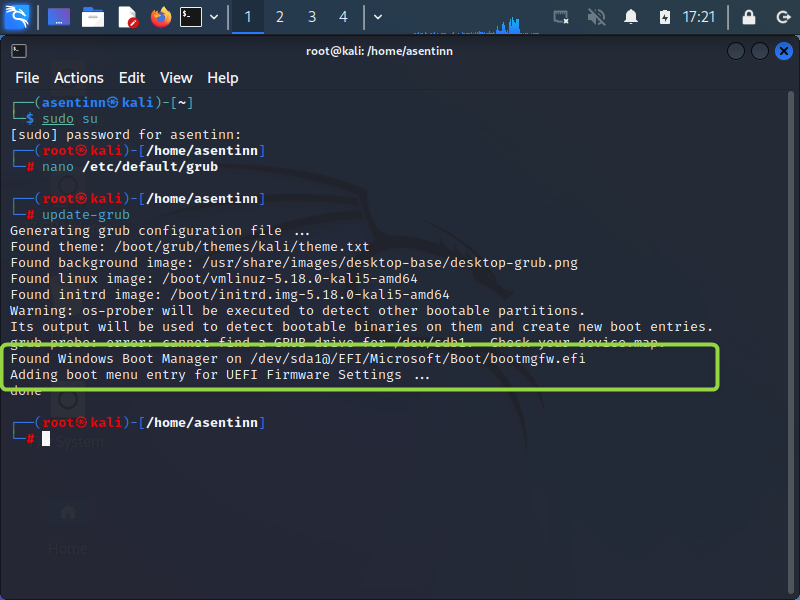
That's it! Now you can select both Windows and Kali on launch. You successfully achieved dual boot with Windows 11 and Kali on encrypted volume!